How to Add Assets Manually to Portfolio
This guide will walk you through the process of manually adding assets to your Findex portfolio.
Last updated 5 months ago
Getting to the Asset List
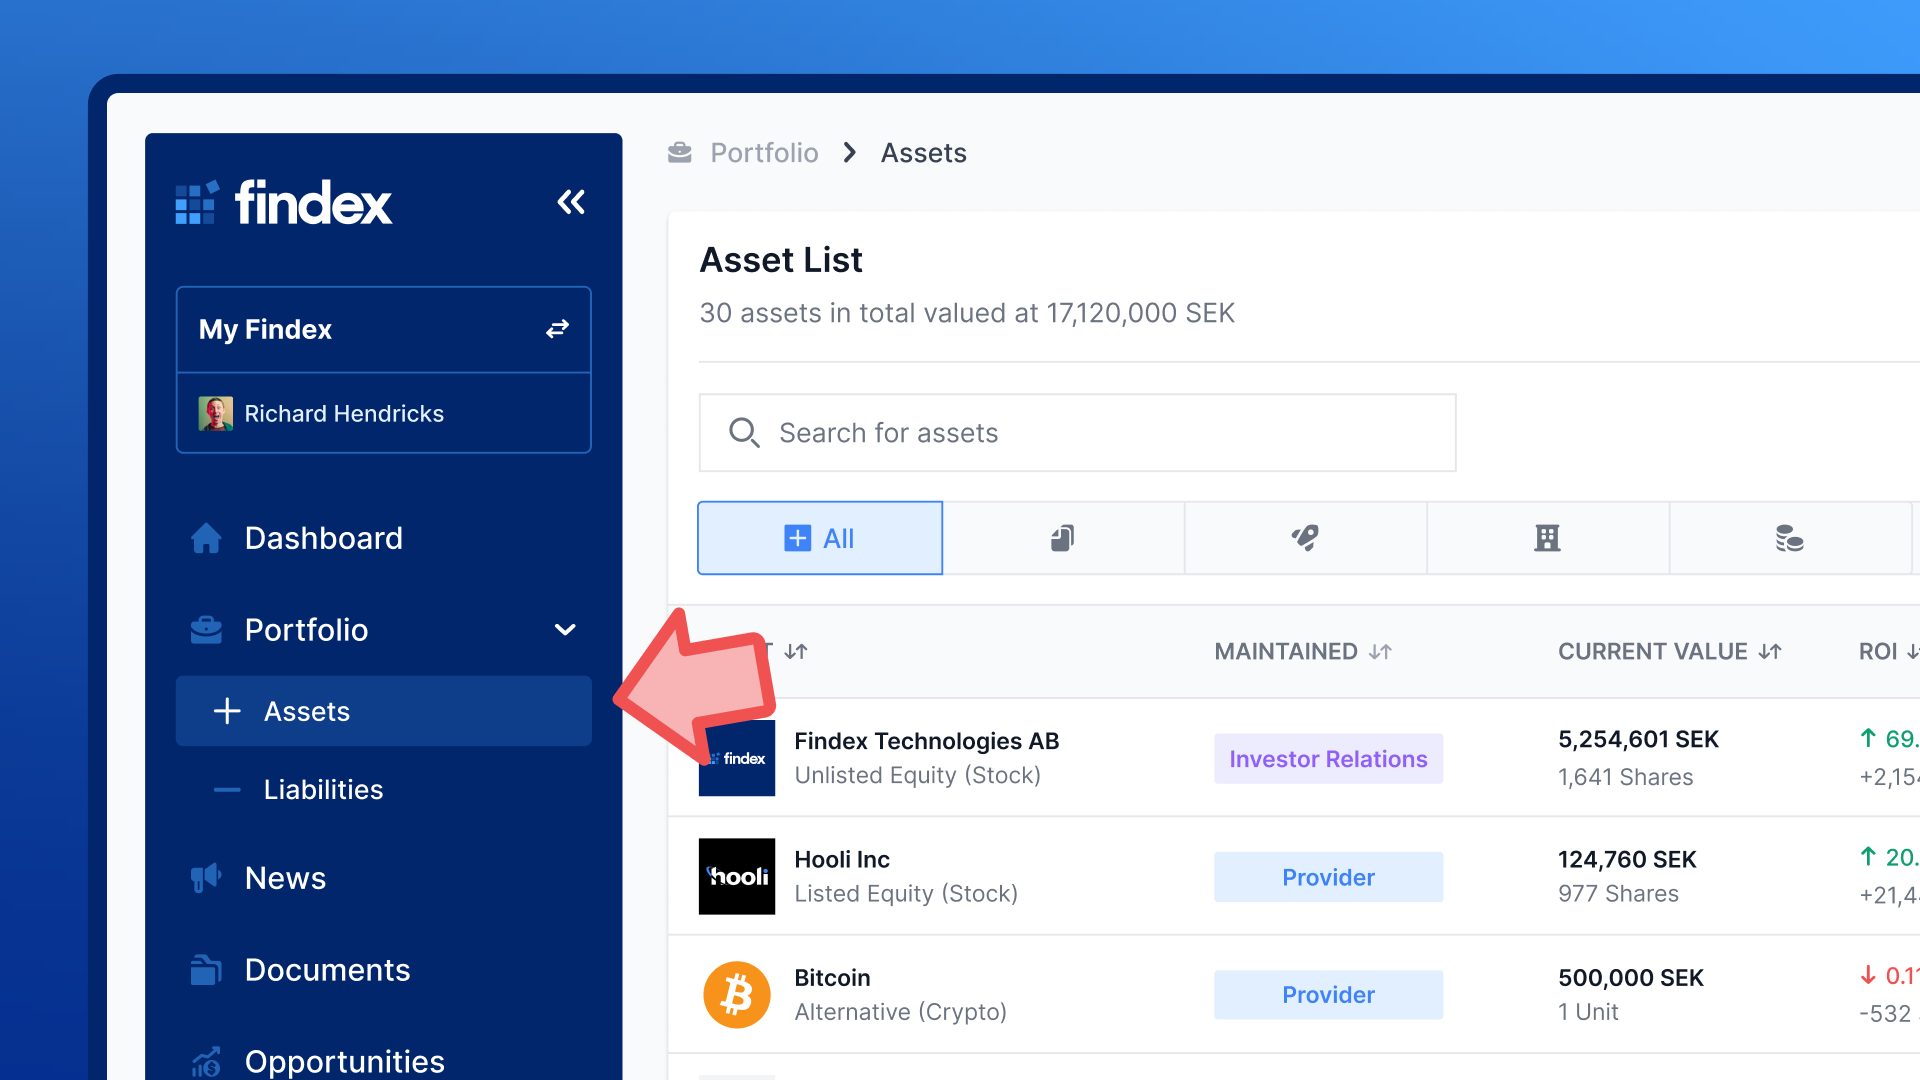
Navigate to the Portfolio section in the left sidebar
Click on Assets to view your current asset list
You'll see a comprehensive view of all your assets, including their current values, ROI percentages, and recent activity.
Starting the Add Asset Flow
Once you're on the Asset List page:
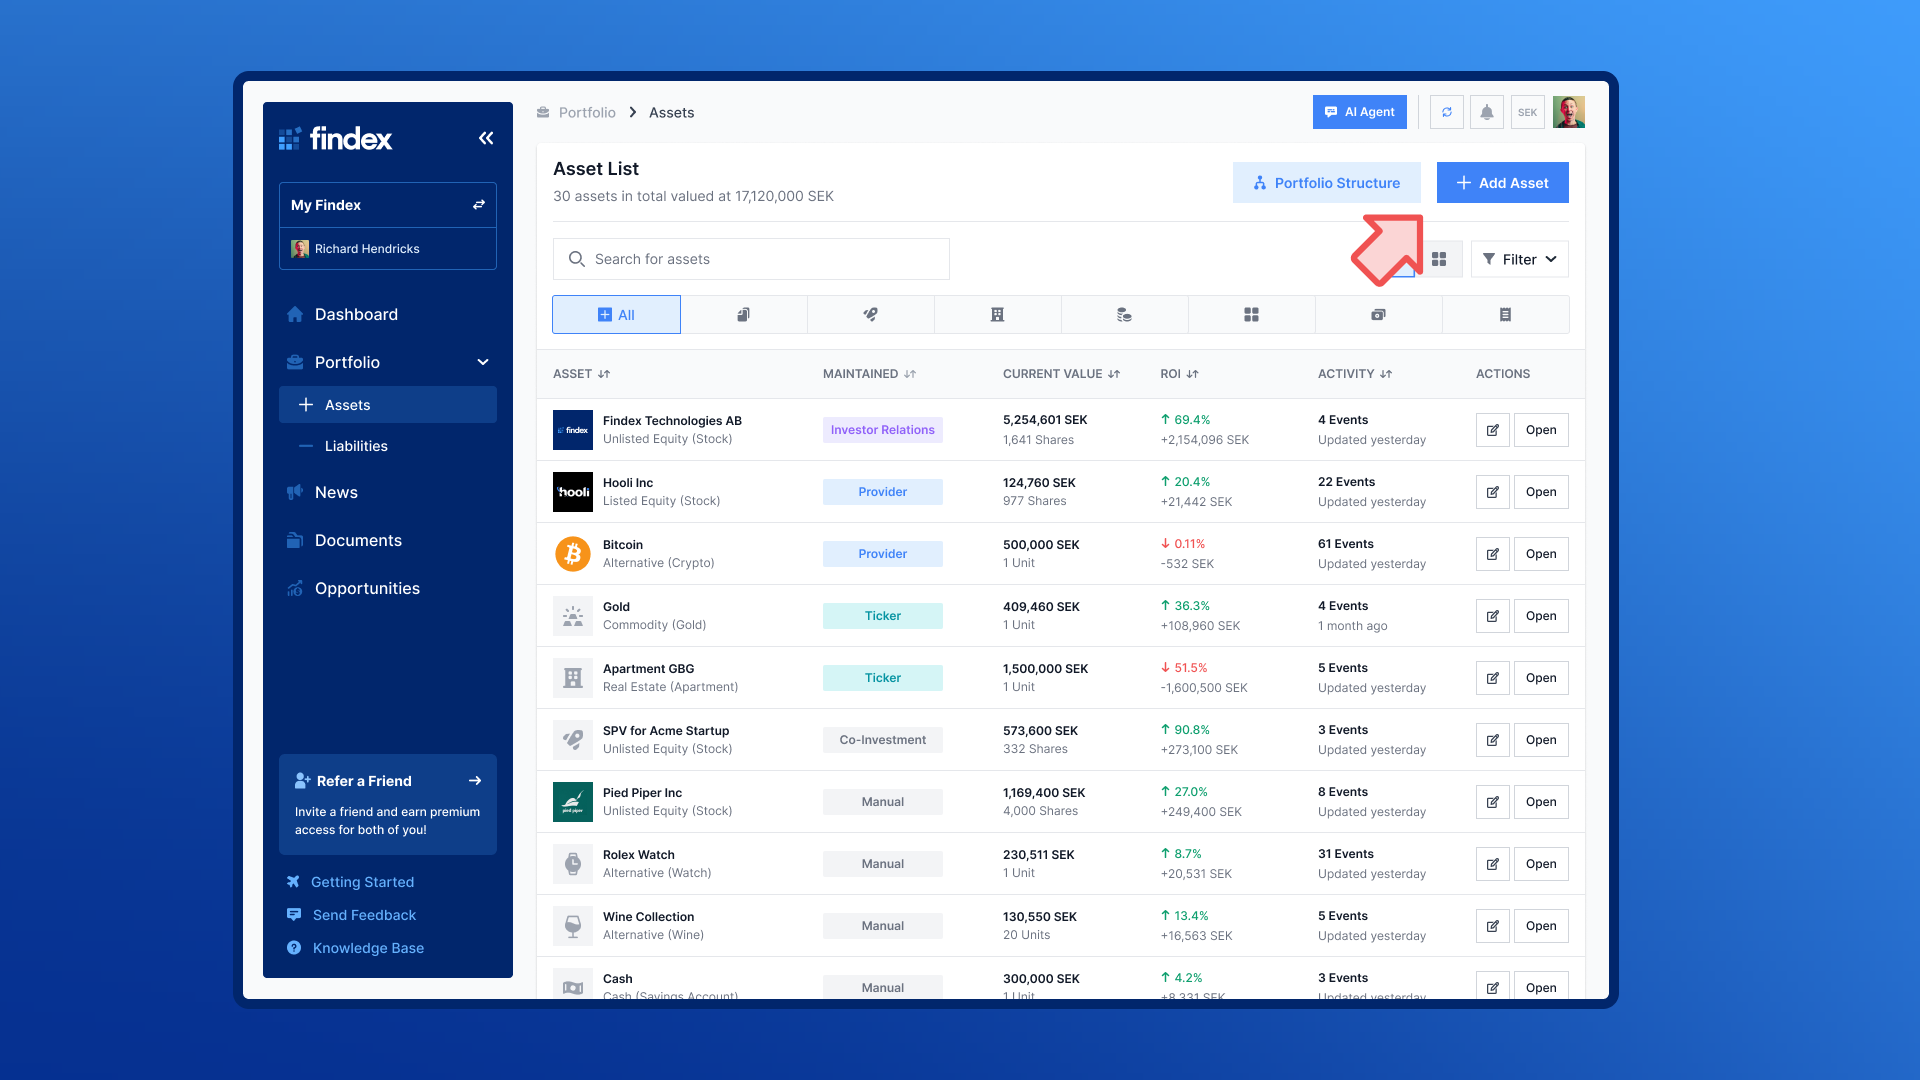
Click the blue "+ Add Asset" button located in the top right corner of the page
A modal window will appear presenting you with two ways of adding assets:
Add Asset Automatically by connecting accounts or by importing data via CSV-files
Add Assets Manually - Select specific asset class to add manually by entering data.
For this guide, we'll focus on the manual process.
Select Asset Class to Add Manually
When adding assets manually, Findex offers tailored workflows for different asset classes. Select the appropriate category:
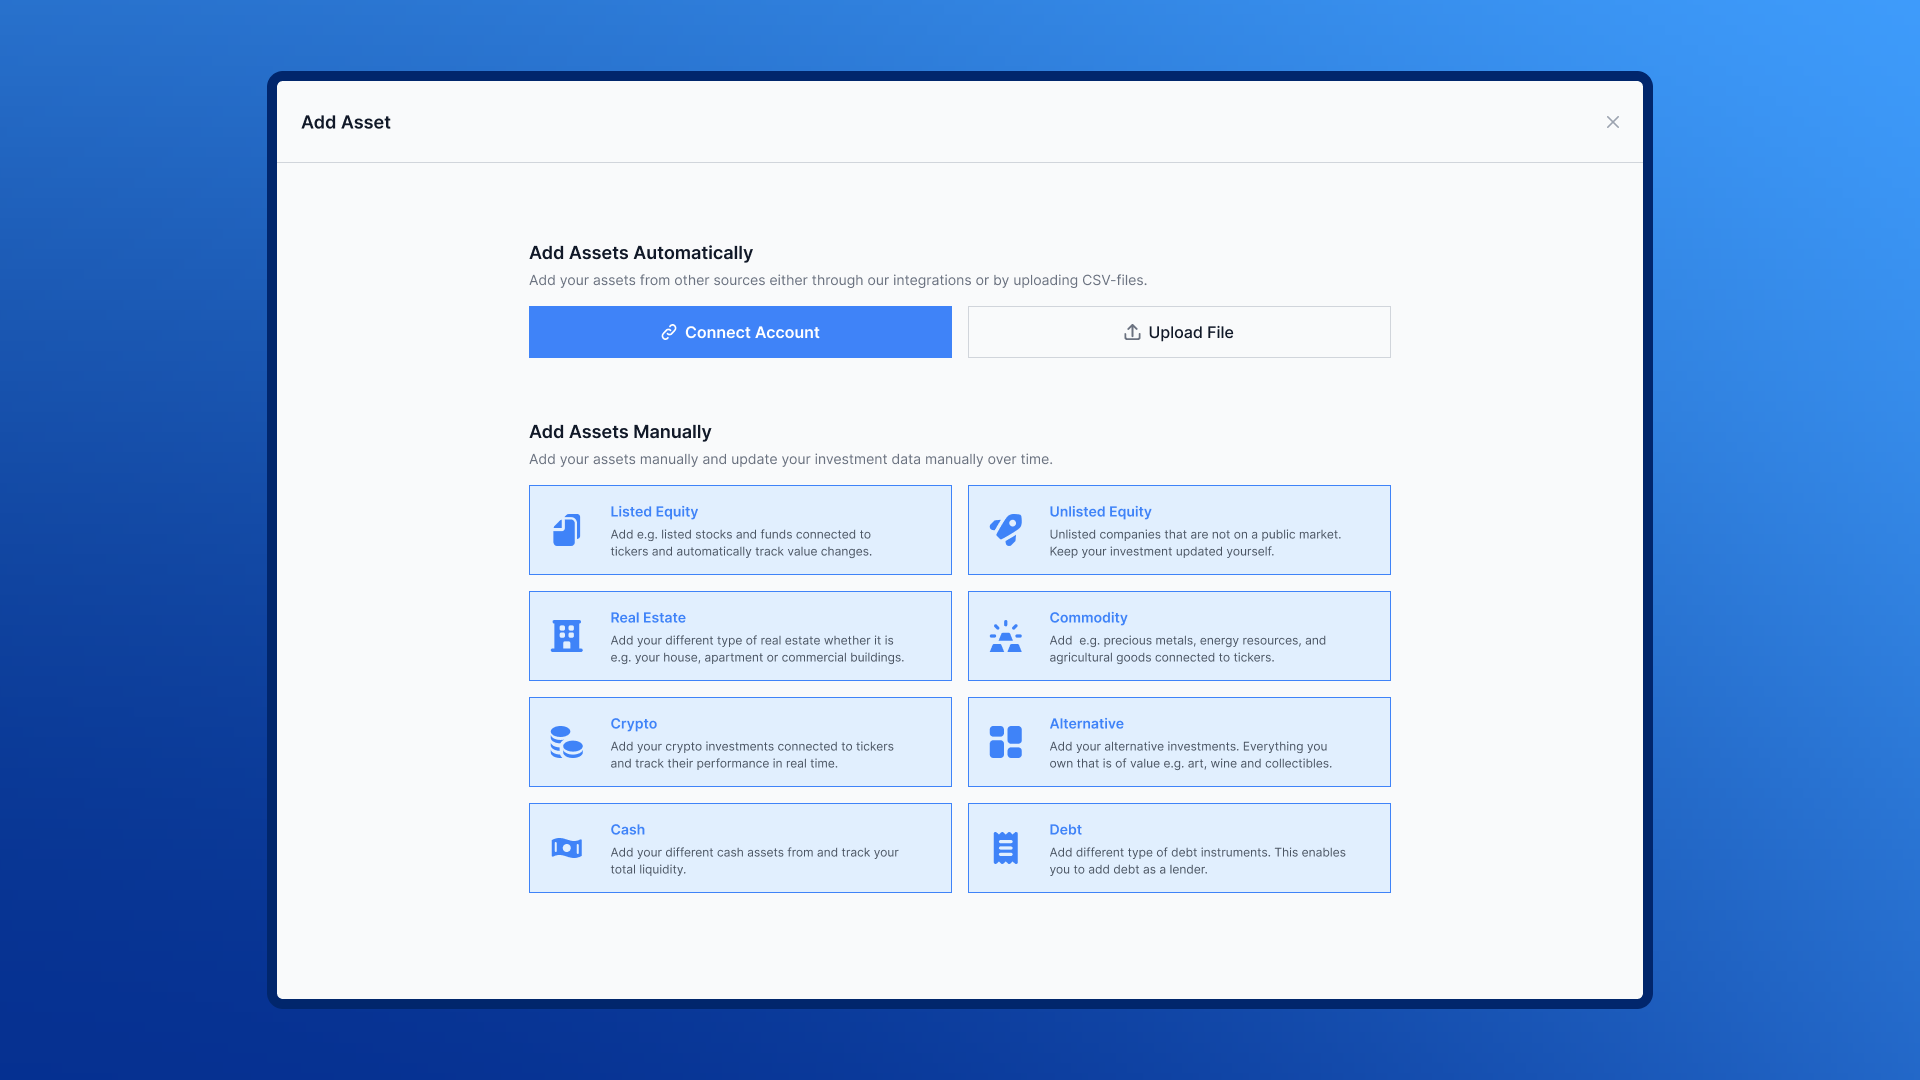
Available Asset Classes
There are in total 8 different asset classes to choose from as of now with respective sub types:
Listed Equity
For publicly traded stocks and ETFs connected to tickers. The system will automatically track value changes.Unlisted Equity
For private company shares not listed on public markets. Keep your investment data updated manually.Real Estate
For different types of real estate properties (houses, apartments, commercial buildings).Commodity
For precious metals, energy resources, and agricultural goods connected to tickers.Crypto
For cryptocurrency investments connected to tickers. Track performance in real-time.Alternative
For alternative investments including art, wine, and collectibles.Cash
For different cash assets and liquidity tracking.Debt
For different types of debt instruments. Note: This enables you to add debt as a lender.
Completing the Asset Information Steps
After selecting your asset class, you'll be guided through a series of steps to enter your investment details. The exact fields may vary depending on the asset class, but typically include:
Asset Name — Give your investment a recognizable name.
Quantity — How many units or shares you hold.
Invested Amount — The total amount you've invested, including the currency.
Current Value — The current estimated value of the investment.
Additional Details — Depending on the asset class, you may be asked for extra information like a ticker symbol (for listed equity), property address (for real estate), or other relevant data.
[Image: The asset information form with fields for name, quantity, invested amount, and current value]
Confirmation
Once you've filled in the details and clicked Save:
Your new asset will appear in the Investments list.
It will be marked as a manual asset (as opposed to a provider import).
The asset will be included in your portfolio value, net worth, and diversification calculations.
You can click on it anytime to view its detail page, add documents, or update its valuation.
[Image: The investments list with the newly added manual asset visible]
Tips
For assets with tickers (Listed Equity, Crypto, Commodity), the system will automatically track current values
For manual assets (Unlisted Equity, Real Estate, Alternative), remember to update values periodically
Use the search function to quickly find assets in your list
You can always edit later — Don't worry about getting everything perfect on the first try. You can update any asset's details at any time.
Use the right asset class — This ensures your diversification breakdown is accurate and the right data fields are shown.
Add a current value — Even if it's an estimate, entering a current value helps your dashboard and net worth calculations stay meaningful.
For listed stocks, consider connecting a provider instead — it will automatically keep your valuations up to date.
You can add multiple assets of the same type by repeating this process
Need Help?
If you encounter any issues while adding assets, please contact our support team at team@findex.se